

Egg Tray Production Process
An engineering-focused guide to how pulp molded egg trays are manufactured — from waste paper pulping to vacuum forming, drying, stacking, and packing.
Planning a project? Explore our Egg Tray Production Line solutions or request configuration advice from our engineers.
Overview of the Egg Tray Manufacturing Process
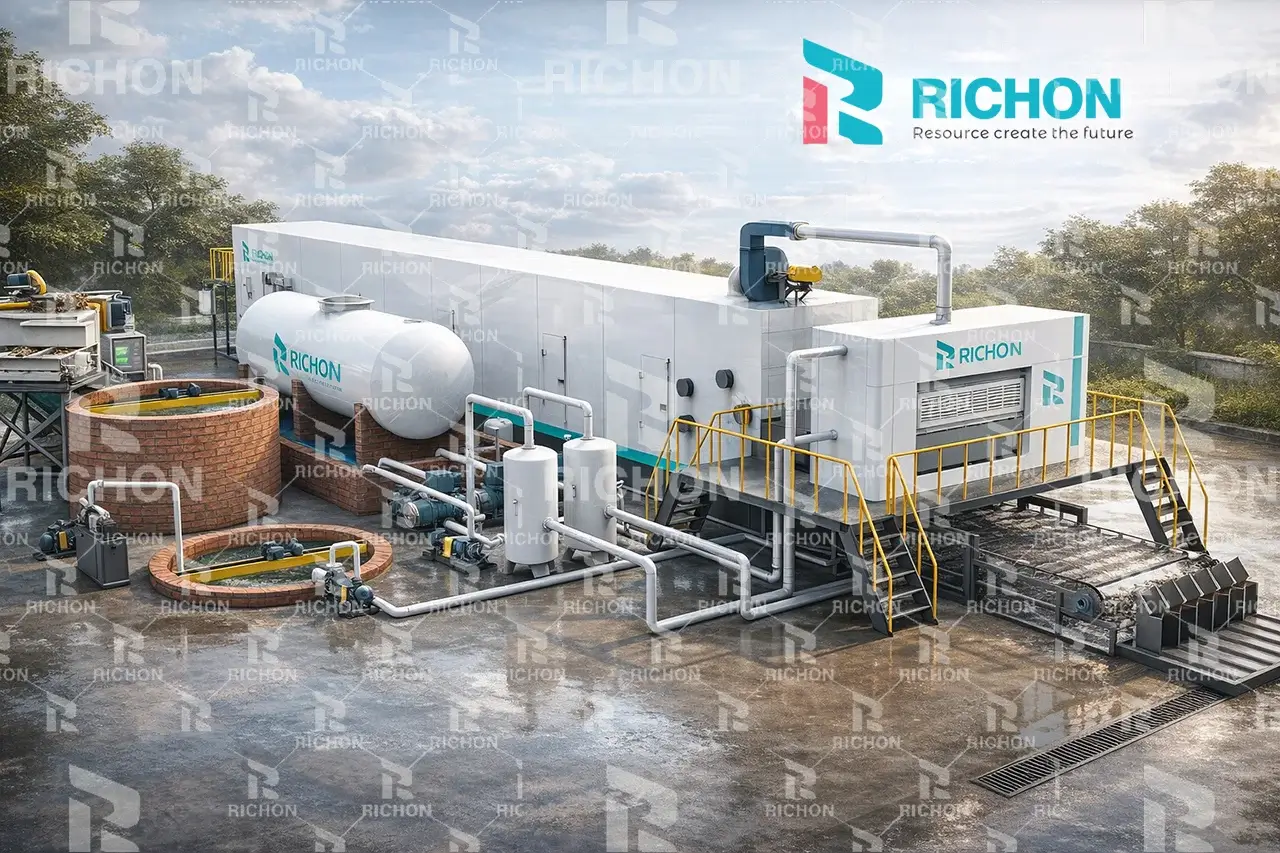
Egg trays are produced through pulp molding — a fiber forming process that converts recycled paper into protective packaging. For stable production, the process must control pulp consistency, vacuum forming stability, mold precision, and drying efficiency.
What this page helps you decide
- Which stage limits your capacity and how cycle time impacts ROI
- Which drying solution fits your output target and site conditions
- Which parameters you must control to reduce defects and rejects
Related technology hubs: Production Line · Drying Comparison · Mold Technology
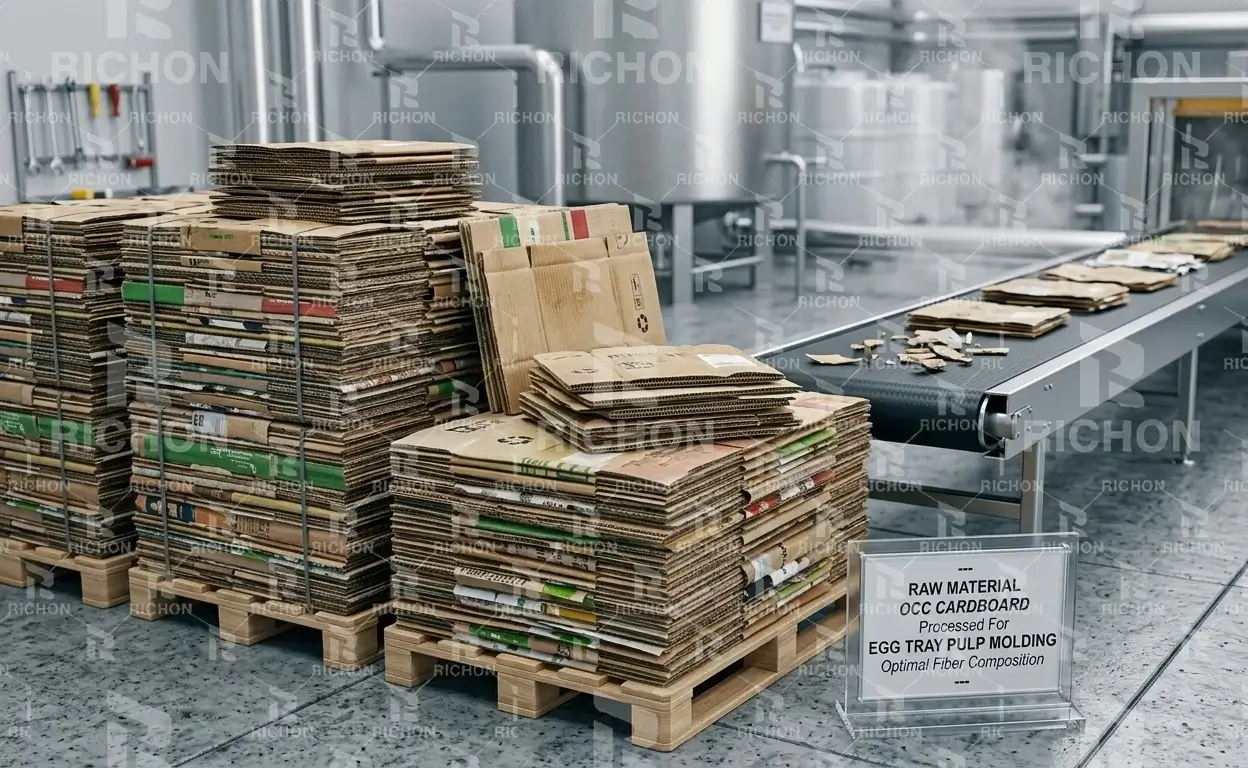
Typical raw materials
Most factories use a mix of recycled fiber sources such as newspapers, OCC cardboard, and paper cartons. Raw material cleanliness affects screening load, refining needs, and forming stability.
Egg Tray Production Flow
Standard workflow used in modern pulp molding factories — optimized for stable output and consistent quality.
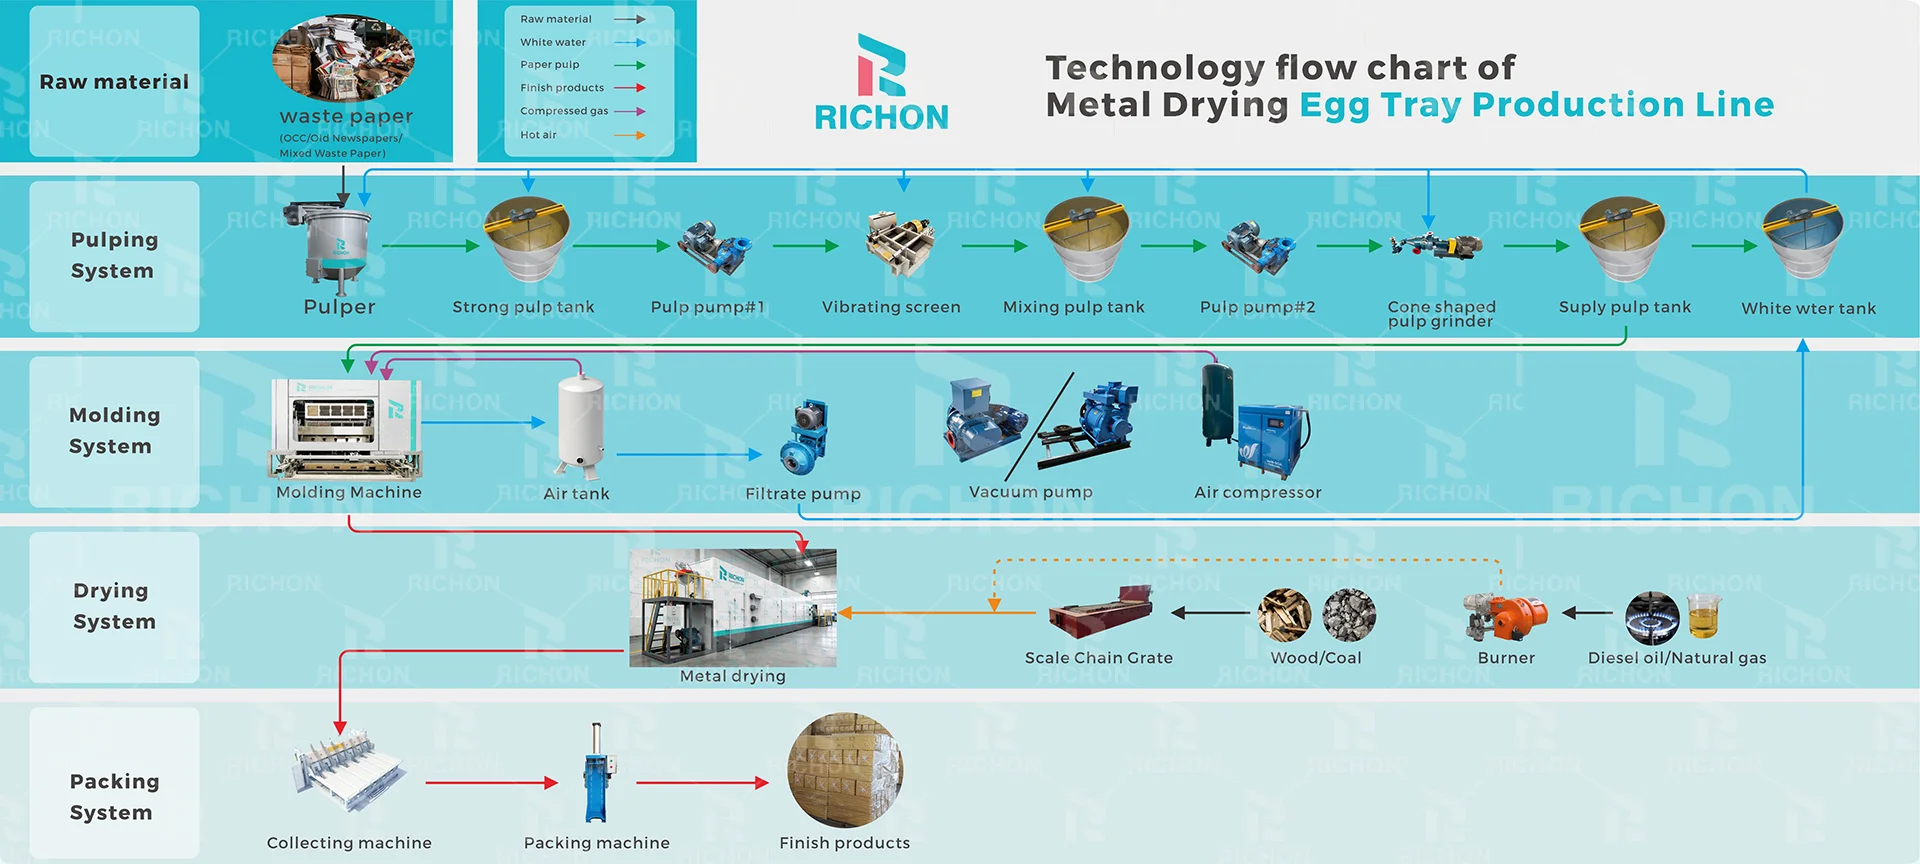
Step-by-Step Egg Tray Production Process
Each stage below includes the purpose, key control points, and practical notes used in real factory operations.
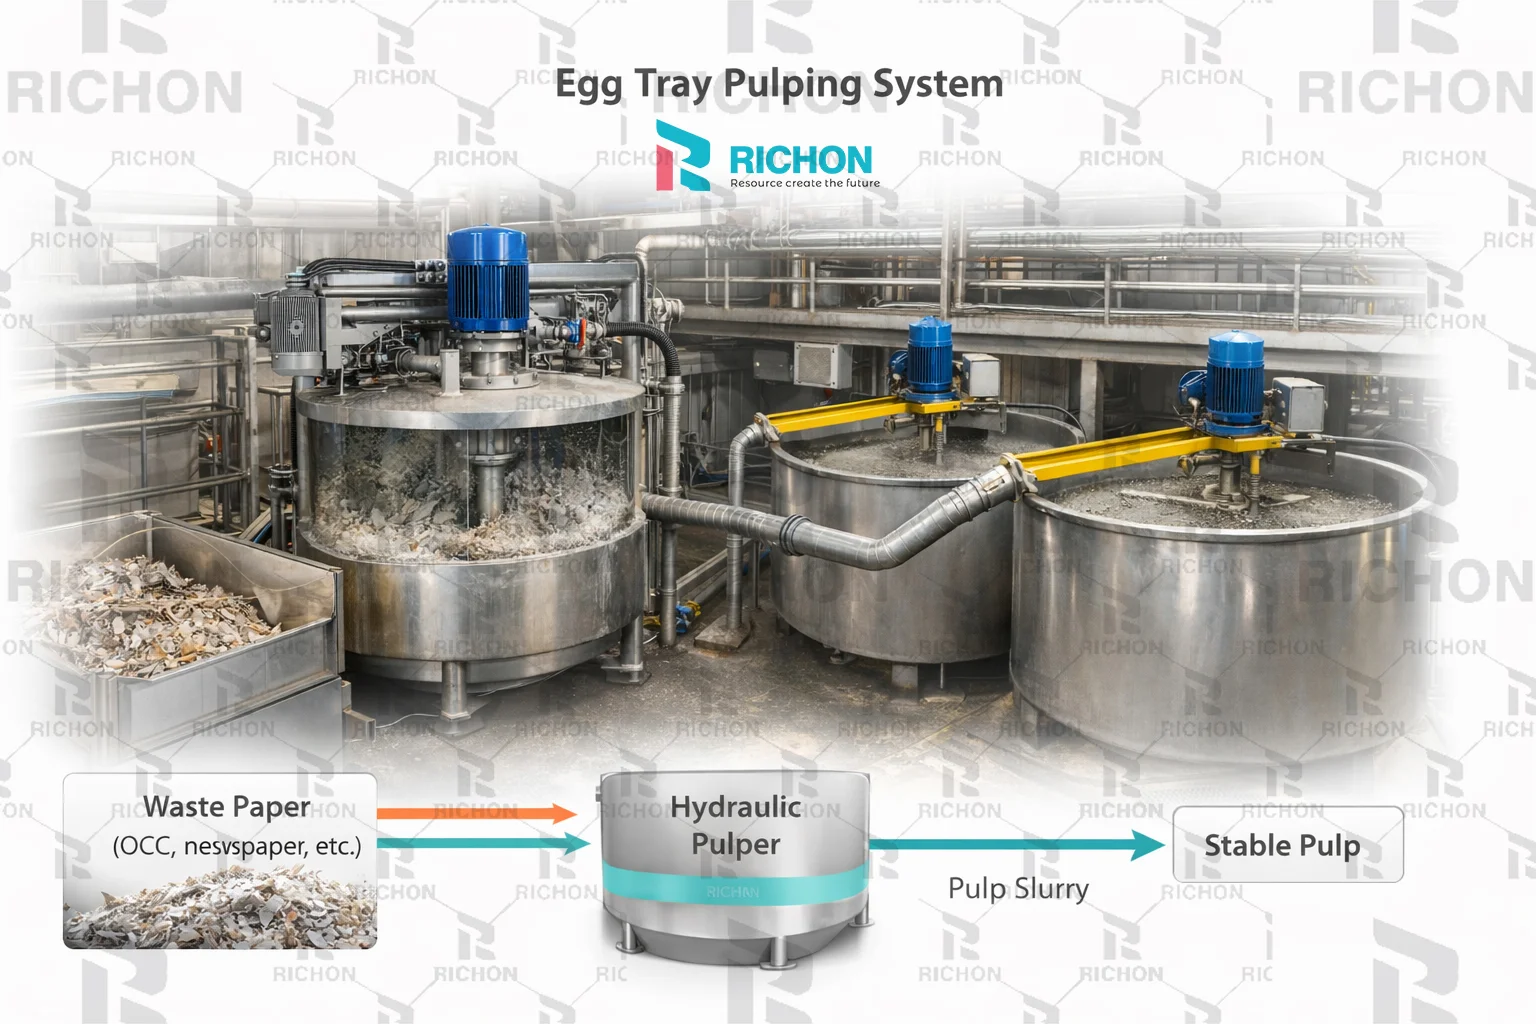
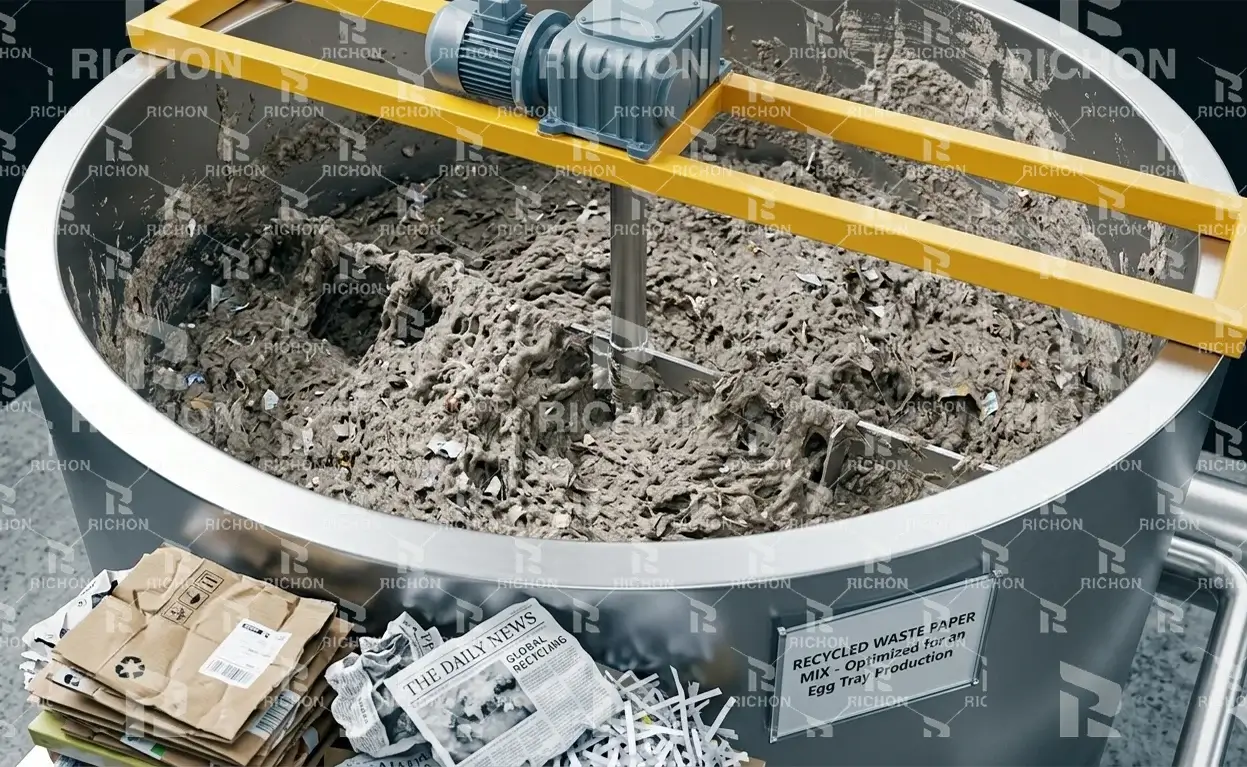
Pulping & Refining System
The pulping stage converts waste paper into a uniform slurry. A hydraulic pulper breaks down fiber bundles while mixing water and recycled paper. The slurry is then stabilized through storage tanks, screening, and optional refining.
The goal is not simply “more concentration”, but stable consistency and dispersion. Stable pulp improves forming repeatability, reduces thin-wall defects, and helps maintain weight tolerance from tray to tray.
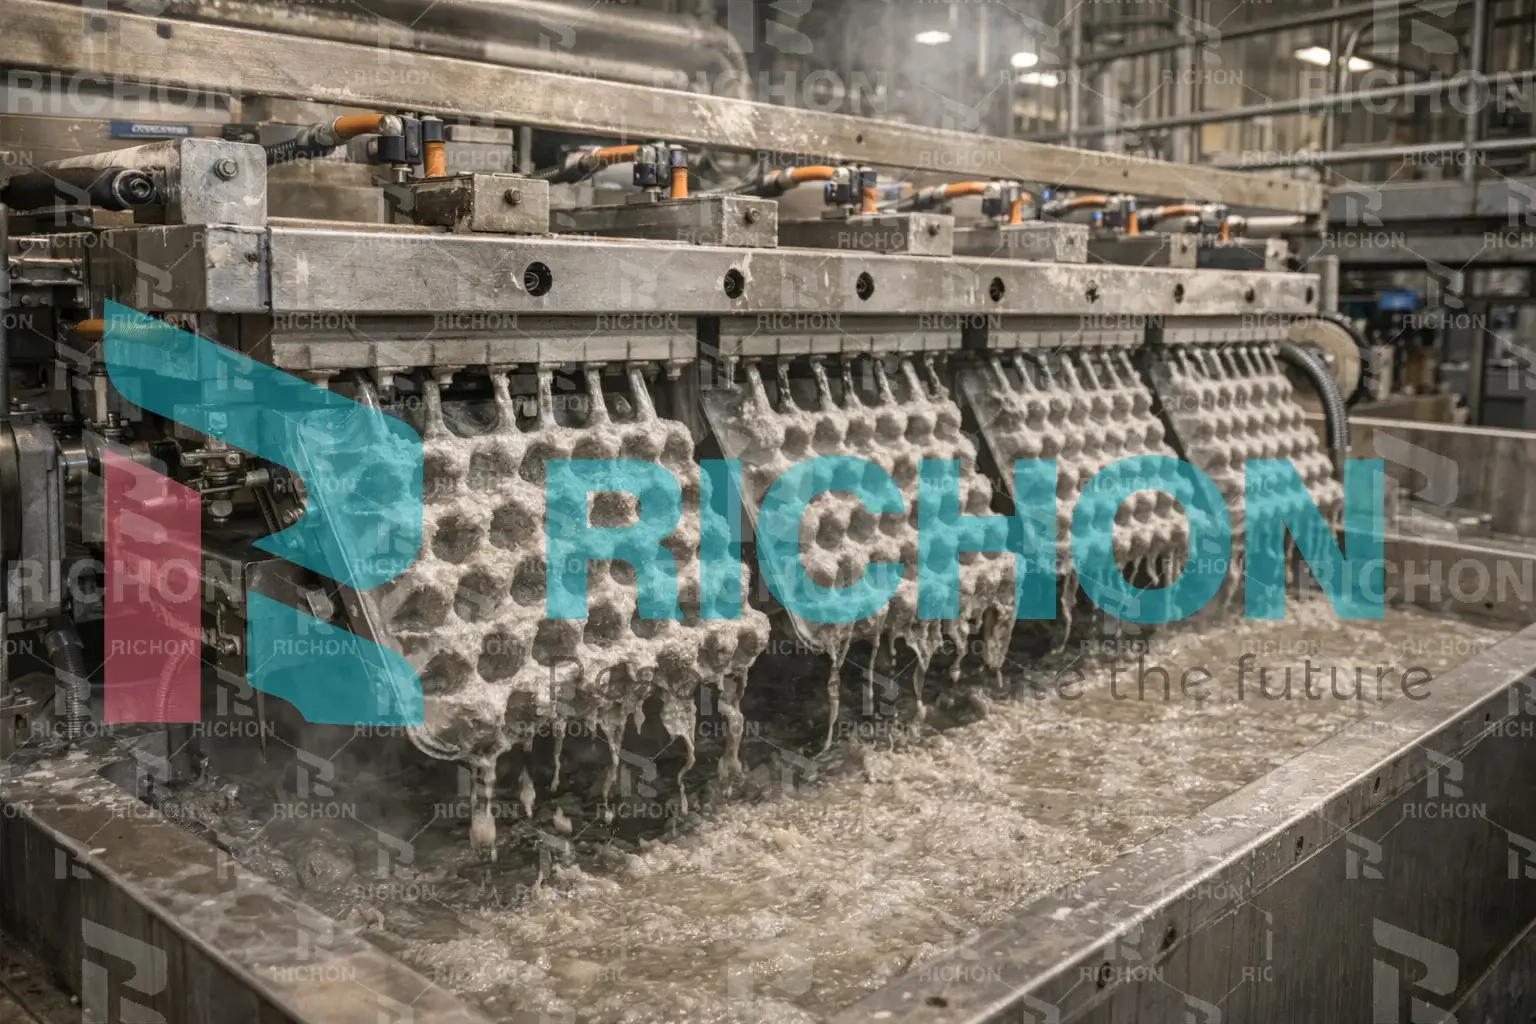
Vacuum Forming
Vacuum forming is the heart of pulp molding. Vacuum pumps create negative pressure, pulling fibers onto the mold surface. Mold design and machining accuracy influence cycle time, tray strength, edge integrity, and surface finish.
Forming stability depends on consistent pulp supply, balanced vacuum distribution, and mold sealing quality. For stable mass production, the forming process must keep the tray walls uniform while minimizing rejects.
Related: Mold Technology

Transfer & Optional Hot Pressing
After forming, wet trays are transferred to the next stage. This step looks simple but has major impact on deformation and cracking. A stable transfer mechanism reduces handling damage and improves yield.
Some production lines add hot pressing to improve surface smoothness and stiffness. It is often used when customers require premium appearance, tighter dimensional tolerance, or more consistent stacking performance.
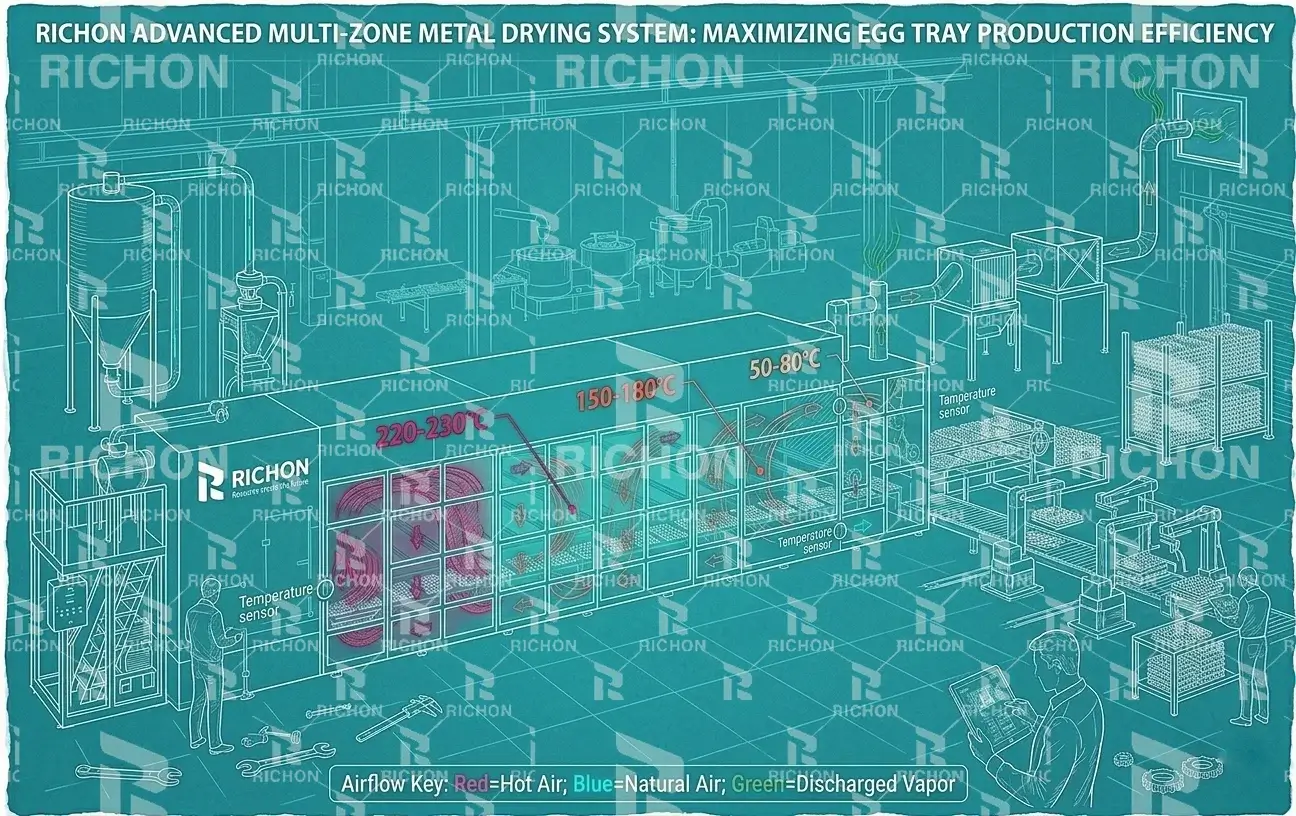
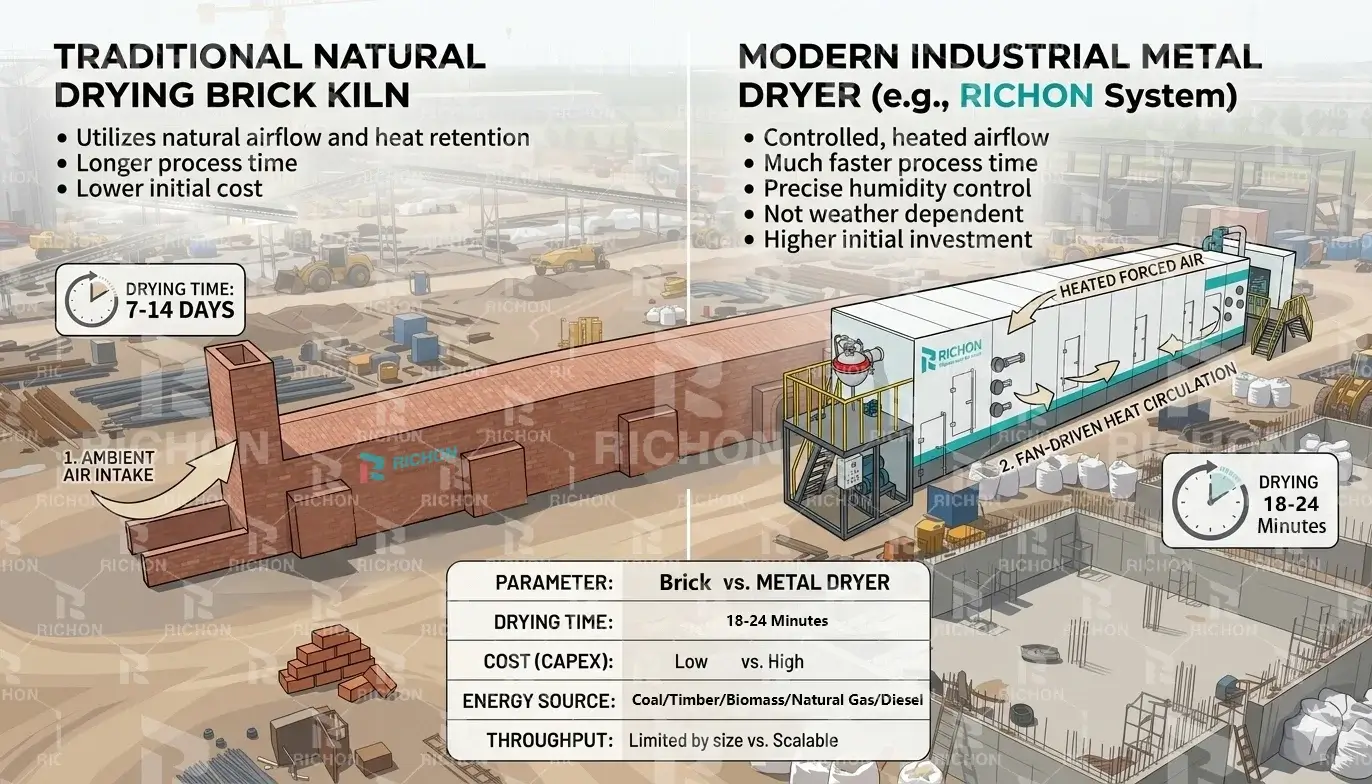
Drying System
Drying is usually the most energy-intensive stage and the most common capacity bottleneck. The drying method determines footprint, labor requirement, heat efficiency, and maximum sustainable output.
Drying quality depends on temperature zoning and airflow distribution. Poor airflow causes warping, soft trays, or inconsistent strength. For many medium/large projects, automated metal drying systems provide stable throughput and easier process control.
Compare options: Drying System Comparison
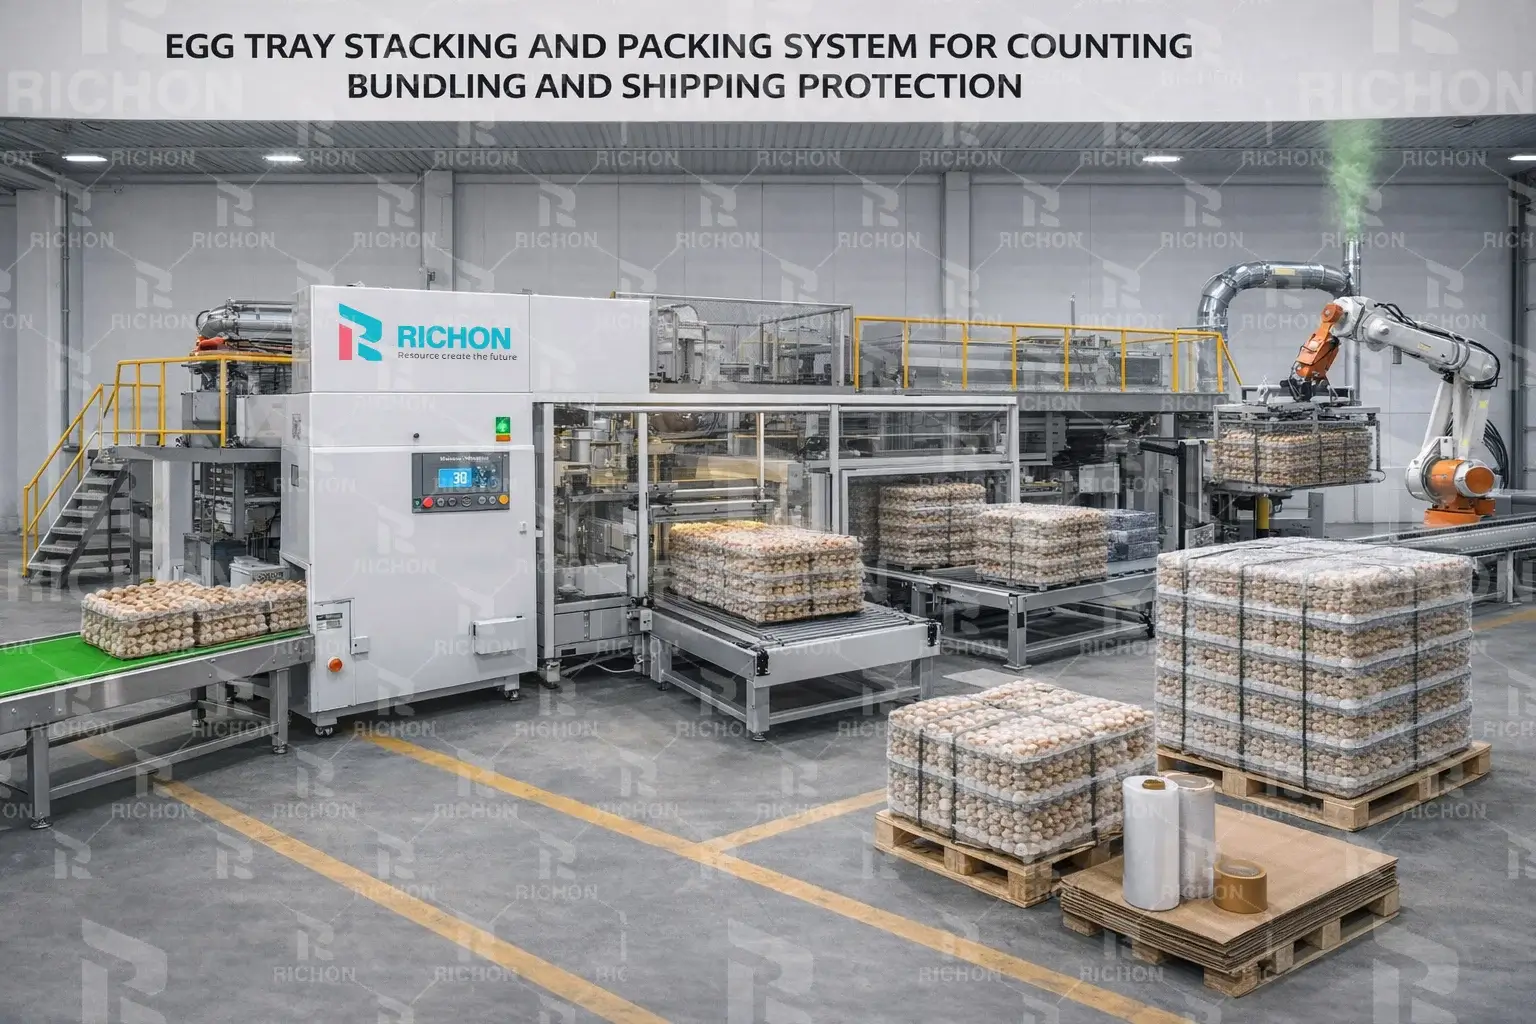
Stacking, Counting & Packing
Finished trays are stacked, counted, and packed. Automation improves labor efficiency and reduces damage during handling. Consistent bundling also reduces shipping loss and helps downstream warehousing.
If you sell to distributors or large farms, packing consistency becomes a quality signal. It affects customer perception as much as product appearance.
Explore complete solutions: Egg Tray Production Line
Drying Solution Selector (Choose the Right Dryer)
Drying is the most energy-intensive stage and a common capacity bottleneck. Use this selector to compare options based on production capacity, footprint, investment, and available heat source.
Quick selection rules (engineering logic)
- Low capacity / low budget: simple drying solutions may work if labor is available and climate is suitable.
- Medium capacity: drying stability matters more; automation improves throughput and reduces deformation risk.
- Large capacity: prefer automated, zoned drying with controllable airflow and stable heat supply.
Best for
Very small capacity or trial production where investment must be minimal and climate allows stable drying.
- Lowest equipment cost
- Simple operation
- Easy to start small
- Unstable throughput
- Large footprint
- Quality affected by climate
When to avoid
If you must guarantee daily output, run multi-shifts, or sell to customers with strict quality requirements.
Best for
Projects with stable site and enough space where a traditional solution is acceptable and heat source is available.
- Can handle continuous production
- Durable once built
- Widely understood operation
- High civil work cost
- Hard to relocate
- Energy efficiency varies
Engineering warning
Brick kiln drying can look low-cost on equipment, but total project cost includes land, construction, and time. If you scale capacity later, the layout may limit upgrades.
Best for
Medium to large production where stable throughput, automation, and controllable drying quality are required.
- Stable drying and quality
- Higher heat efficiency potential
- Supports scaling and multi-shifts
- Higher initial investment
- Requires stable energy supply
- Needs proper commissioning
Recommended next step
Use a drying comparison guide to match your capacity, heat source, and factory size. This prevents under-sized dryers or oversized investment.
Process KPI Dashboard (What to Monitor for Stable Output)
These KPIs help you keep production stable and reduce defects. Use them as a daily checklist for process control, troubleshooting, and capacity planning.
Pulp Consistency
If consistency swings, tray weight and wall thickness swing — you’ll see weak corners and higher rejects.
Vacuum Stability
Vacuum fluctuation causes uneven fiber deposition and edge defects. Balance vacuum lines and maintain seals.
Moisture After Drying
Inconsistent moisture leads to soft trays or warping. Drying must match forming throughput to avoid bottlenecks.
Cycle Time
Cycle time determines capacity. If drying is slower than forming, the line will accumulate wet trays or idle.
Key Technical Parameters (What to Control and Why)
Practical ranges used in real projects. Your exact settings depend on tray weight, fiber mix, and drying method.
| Parameter | Typical Range | Why it matters |
|---|---|---|
| Pulp Consistency | 3% – 5% | Controls wall thickness stability, reduces weak corners, improves repeatability. |
| Vacuum Pressure | -0.04 to -0.06 MPa | Improves fiber deposition, surface finish, and edge integrity on molds. |
| Drying Temperature | 160°C – 220°C | Too low causes soft trays; too high increases warp risk and brittleness. |
| Capacity Planning | 1000 – 8000 pcs/h | Requires matching forming cycle + drying throughput + stacking efficiency. |
Quality Control & Common Defects (Cause → Fix)
Built for real production: diagnose issues quickly, reduce rejects, and keep output stable.
Thin walls / weak corners
Cause: unstable pulp consistency, poor fiber dispersion, uneven vacuum suction.
Fix: stabilize consistency, improve screening/refining, check mold sealing and vacuum line balance.
Warping after drying
Cause: uneven airflow, over-temperature zones, moisture gradient too large.
Fix: optimize airflow distribution, adjust temperature zoning, improve transfer stability.
Rough surface / poor finish
Cause: mold surface condition, fiber contamination, insufficient refining.
Fix: improve raw material sorting, maintain molds, adjust refining and slurry screening.
Edge cracks / deformation
Cause: unstable transfer, mold misalignment, early handling before strength forms.
Fix: stabilize transfer mechanism, check alignment, optimize drying exit moisture control.
Factory Layout & Utilities Planning
Confirm space and utilities before equipment selection — they decide drying choice, investment, and long-term stability.
Layout logic
A practical layout follows a straight material flow: raw material → pulping → forming → drying → stacking → warehouse. Keep wet sections near drainage and keep the drying section close to heat source and ventilation.
- Reserve maintenance space around pulp tanks and pumps
- Keep wet transfer path short to reduce deformation risk
- Plan for future automation if you scale capacity
Utilities checklist
Utility conditions vary by country and factory site. These four items decide whether your drying system is practical.
FAQ: Egg Tray Production Process
Common questions from buyers and investors planning an egg tray manufacturing project.
What raw materials are used for egg tray production?
How much waste paper is needed to produce egg trays?
Which drying system is best for egg tray production?
What determines egg tray production capacity?
Do I need hot pressing for egg trays?
Planning an Egg Tray Production Project?
Our engineers provide factory layout suggestions, drying system selection, and configuration advice based on your target capacity, available energy, and local site conditions.
Contact Us
Get in touch with our team for any inquiries about our egg tray machines and services.
Project Scope
Do you need a complete project solution or a partial solution? Our team can customize the perfect setup for your specific needs and budget constraints.
Product Expectations
What kind of finished product do you expect, and what quality standards are important to you?
Project Timeline
What is your expected timeline for project implementation and operation?
Budget Range
What is the approximate budget range for your project procurement?
Send Us Your Information
Accurate project information will help us provide the perfect solution for your needs.